I’m Moving…

24 Sep

i'm movingI’ve decided to make the move to a self hosted blog so I can have more control over the look and feel of allthingshandmade.org.

For anyone who has subscribed by email then you don’t need to do anything, you will still receive notifications of new posts by email. It’s all my lovely wordpress.com followers that will miss out and I’m hoping that you will all visit my new site and re-subscribe so you don’t miss anything.

I hope to see you all on the other side and thank you for your continued support.

Lyndsay x

Rainbow Love Heart Card Collection

16 Sep

I wanted to share with you this Rainbow Love Heart Card Collection I have just made and Listed on my Etsy Shop. I’d love to know what you think and I’ve got more coming soon…

Rainbow love card collection cut out design

Rainbow love card collection cut out designRainbow love card collection cut out designRainbow love card collection cut out design

Button Love Heart Picture

16 Sep


I’ve been busy this weekend getting a few bits and pieces completed. The first is this 2nd love heart picture design. I decided to use buttons as I’d been given some lovely ones with my Mollie Makes magazine.

There wasn’t quite enough for this design so I used some others that I had been saving and recycled from old shirts and cardigans.

For the background I recycled an old column table lampshade that was ready to be thrown out but I really liked the texture and thought it would look great against the buttons.

I used double-sided tape to stick the buttons on to the textured background and used the same heart template that I used for the 3D butterfly heart picture.So now they can sit pretty next to each other…

button love heart picturebutton love heart picturebutton love heart picturebutton love heart picturebutton love heart picturebutton love heart picturebutton love heart picture


3D Butterfly Heart Picture

8 Sep


3d butterfly love heart picture

After making the Christening Invites last weekend and using 3D butterflies within the design, it inspired me to make this 3D butterfly heart picture.

I made this 3D picture using:

1 8×8″ deep box frame

Approx 60 card butterflies

1x brown card for backing

dye cutting butterflies
I cut the butterflies using my dye cutting machine, you can cut them by hand using a stencil, it just takes a little longer……. it literally takes 2 mins on a cutting machine 🙂

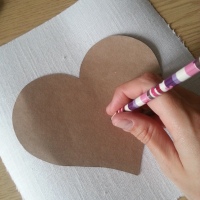
I cut the backing card to fit the box frame and used a stencil to draw a love heart onto the centre of the page.

Using double-sided tape I arranged and fixed the butterflies within the heart stencil, sticking some flat and the rest folded with one wing stuck down to create the 3D effect.

3d butterfly heart picture

3d butterfly heart picture

I’ve got 2 more deep box frames that I will use to create a similar effect but instead of white plain butterflies I will cut them out of old book pages and maps………. I’ll update you with these later!!


Christening Invite

2 Sep

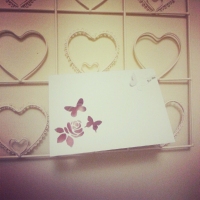
My cousin’s gorgeous baby is being christened next month and I’ve been busy making the Christening Invites today. I made them using my Cricut cutting machine and finished them off with a pink ribbon.

I thought I’d share some of the photos with you…

christening invite butterfly and rose cut out design

christening invite butterfly and rose cut out design

Handmade Button Heart Decoration

4 Aug

My friend bought me this cute heart decoration for my birthday which gave me the idea to attempt to make my own. I also had some cream buttons that were perfect for this project.
button heart decoration
I started by feeding the buttons onto thin wire. Feeding the wire through the holes or through the loop depending on the button type.
button love heart decoration
I then fed a strip of galvanised wire through the back of the looped buttons to give structure to the decoration and make it easier to bend into a sturdy shape.
button heart decoration
I then attached the two ends of the galvanised wire by twisting the ends together. Once the wires were secured I bent the wire into a heart shape.

To make the decoration even sturdier I took some of the thinner wire and wrapped it between each button to secure them further to the galvanised wire. To finish I attached some beige ribbon to the back of the heart decoration and completed with a bow.

button heart decorationbutton heart decorationbutton heart decoration

Free Crochet Jewellery Patterns

29 Jul

I was searching on Twitter yesterday and came across a cute free crochet design for a Peter Pan collar. This also lead me to a great website called The Making Spot which contains lots of fantastic craft designers, ideas, free crochet patterns and lots more.

I thought I’d share with you a couple of free crochet jewellery designs that I came across today, I’m definitely going to start by making this cute peter Pan collar designed by Carol Meldrum.

peterpan collar free patternCrochet Necklaces by Carol Meldrum
crochet bracelet free patternJulie Cuff Bracelet by Robyn Chachula
crochet necklace free patternBlack Lacy Triangles Crochet Necklace
crochet ring free pattern
Crochet Pattern: Crazy Ruffle Ring

Handmade Tea Cup Candle

9 Jul

tea cup candle kit

I got a tea cup candle making set for my birthday in May and I’ve only just got round to using it.
I’ve wanted to make my own tea cup candle for ages so this kit was great  as I’ve never done it before and I now feel confident in making my own from scratch.
Here are some step by step instructions for you to follow:

(Wax heats very quickly so don’t leave unattended or heat with direct heat!!)

What you will need:
1 x tea cup and saucer.
100% Eco soy wax. (amount depends on size of tea cup, i will be using 120g)
1 x candle wick.
Double boiler – pan and Pyrex jug.
Stainless steel whisk.
thermometer.
2 pencils.
Scissors.

1. Fill the saucepan half way with water and bring to boil.

2. Place the soy wax in to the Pyrex jug and place into the saucepan. Turn the heat down to the lowest heat.

3. Whisk the wax slowly and melt the wax to 49 deg c.tea cup candle
4. Place the base of the candle wick into the melted wax and fix it to the bottom of your tea cup. Wait until the wax sets. ( I placed mine in the fridge for a minute to speed this up!)

tea cup candle

5. Carefully take the pyrex jug out of the saucepan and slowly pour the melted wax into the tea cup.
tea cup candle
6. You can straighten your wick at this point using 2 pencils.
tea cup candle - straighten the wick
7. leave the wax to harden for at least 12 hours before using. You can also cut your wick to the correct length.

8. Your tea cup candle is ready and should look something like this.

tea cup candle

Just Married Bunting – Free Vector Image

17 Jun

just married bunting free vector

One of my oldest friends got married yesterday and it was really nice to see her on her wedding day.

It was also the perfect opportunity to experiment with my dye cutting machine and I created a handmade “Just Married” bunting along with a handmade cut out design card.

I’ve include the “Just Married” vector image template for anyone to use, all you need to do is convert the file to SVG which can easily be done online. I placed the love heart bunting at the beginning, middle and end of the design in a contrasting colour and used some silver ribbon to finish. Easy Peasy!!

just married bunting

Just married bunting free vectorJust married bunting free vectorJust married bunting free vector

Diamond Jubilee Bunting – Free Vector Template

31 May

The Queen’s Diamond Jubilee is just around the corner and I’ve still got lots to do before the party on Saturday.

Today I’ve been making some Diamond Jubilee themed bunting which I have made with the help of my cutting machine. (Its new and I love it!!!)

I made the bunting design in Photoshop then converted the file to an SVG so I could cut the designs out on my cutter. I have included the JPEG images I created in Photoshop at the bottom of this post, you can convert these files easily into vector images using an on-line converter (this is what I did).

Fingers crossed the weather will be lovely on Saturday and I can take some better photographs, until then here are some photographs of my handmade bunting displayed higgledy piggledy on my study wall!!!
diamond jubilee handmade bunting free vector imagediamond jubilee handmade bunting free vector imagediamond jubilee handmade bunting free vector imagediamond jubilee handmade bunting free vector imagediamond jubilee handmade bunting free vector imagebunting_crown JPEG VECTORbunting_queen JPEG VECTORbunting_queen JPEG VECTOR

Design a site like this with WordPress.com
Get started